
Guide
Image to Minecraft Blocks: Step-by-Step Guide
Learn how to turn any image into Minecraft blocks with the right width, palette, block counts, and build steps using Blueprint mode from upload to build.
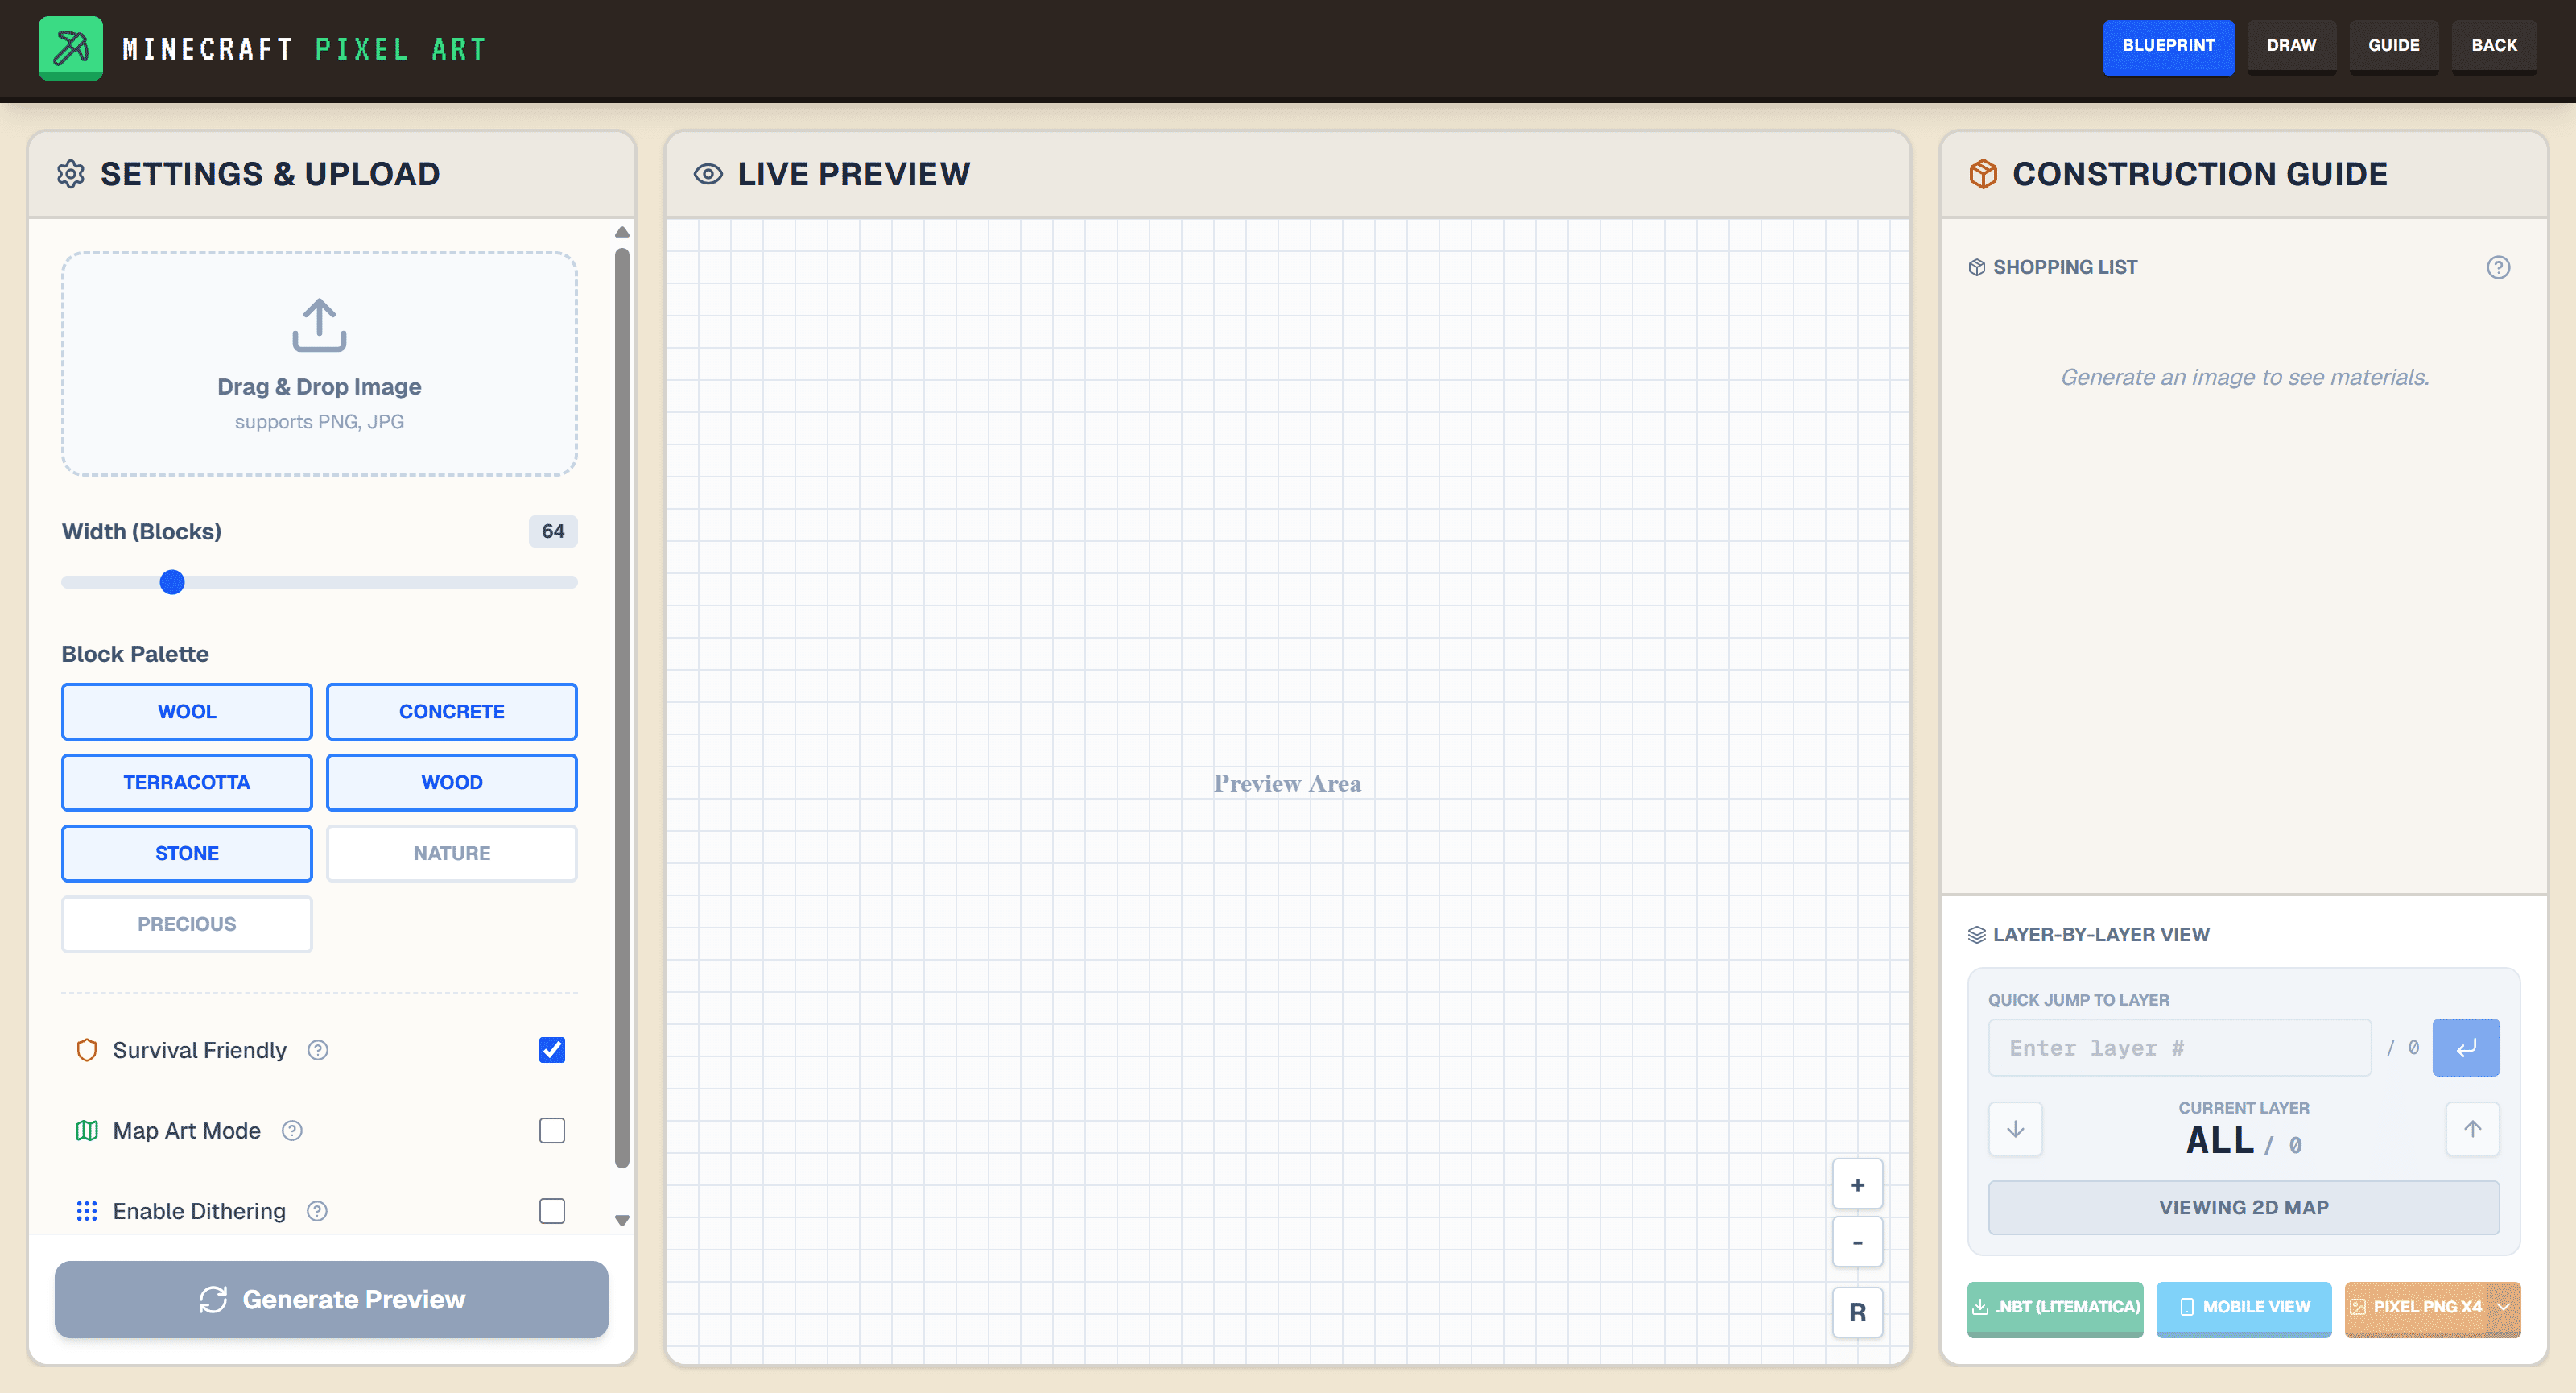
Image to Minecraft Blocks: the practical workflow
If your project starts with an existing logo, photo, sprite, or drawing, the fastest path is not manual painting. The right workflow is to convert the source image into a Minecraft block blueprint first, then refine the result only where it matters.
An image-to-Minecraft-blocks plan should show dimensions that fit your project, recognizable block colors, and a count of what to gather before placing blocks.
This guide uses Minecraft Pixel Art's Blueprint editor, part of our independent browser toolkit for Minecraft builders. It explains image conversion, manual cleanup and exports; the toolkit is not an official Mojang or Microsoft product.
Open the Blueprint workflow and worked example to inspect the result first, or go directly to the editor if you have an image ready. The homepage introduces the broader toolkit; this guide explains the conversion steps.
What "image to blocks" should produce
A useful converter should give you more than a pixel preview.
You want:
- a clear Minecraft-sized width and height
- block choices that match the image closely enough to look intentional
- a buildable palette instead of random decorative blocks
- a block count and shopping list
- a layer or viewing mode you can follow while building
If the tool only recolors the image and stops there, you still have most of the hard work left.
Step 1: Start with the right source image
Most conversion problems happen before the upload.
Good source images usually have:
- strong silhouettes
- clear separation between foreground and background
- limited noise
- a shape that still reads when reduced
Weak source images usually have:
- tiny details everywhere
- heavy gradients
- realistic textures
- busy backgrounds that become visual clutter once converted
If you are unsure, make a quick copy of the image and crop it more tightly first. A smaller, cleaner frame often beats a "full" image with too much information.
Keep transparent space separate from background color
A transparent PNG can leave empty cells in the block plan. A white background is still visible image content, so it becomes blocks unless you remove it first. A painted checkerboard is also image content; use a file with actual transparency rather than a screenshot of a checkerboard.
In our October 21 browser check, a 16 × 16 PNG with 128 fully opaque pixels and 128 fully transparent pixels produced a 16 × 16 grid containing 128 material blocks. Empty cells kept their positions but did not appear in the shopping list or material CSV. This checks the browser conversion and exported counts, not an in-game build. Soft, partly transparent edges can produce different results after resizing, so inspect your own outline.
If the background becomes blocks, check the source file first. You can prepare a transparent PNG in an image editor or try the editor's Remove background control. Cutout quality still needs inspection; a white-looking preview alone does not prove that a file is transparent.
Step 2: Choose the Minecraft width before you care about perfection
Start from Blueprint Mode and set a width that matches the kind of build you actually want once you open the editor.
As a practical rule:
- 16 to 32 blocks wide is useful for icons, signs, and simple faces
- 48 to 96 blocks wide is a good range for murals and detailed logos
- 128+ blocks wide is where material planning and build discipline start to matter a lot more
Do not start with the biggest possible canvas. Start with the smallest size that still preserves the idea of the image. If the shape works small, scaling up later is much safer than shrinking a chaotic conversion.
Step 3: Tune the palette instead of accepting the first pass
The first conversion is a draft, not a final answer.
Choose your width and block families, then click Generate Preview. After changing width, palette, Map Art Mode, or dithering, click Generate Preview again to apply the settings to the block grid. The previous result can remain visible while you adjust controls; check the grid dimensions and material list after regenerating.
After upload, review these decisions:
Use a practical block family
If the build is for survival, avoid fancy blocks early. Narrow the palette to block families you can realistically gather.
Useful families include:
- concrete
- wool
- terracotta
- stone-like blocks
This keeps the result closer to what you can really build in a world instead of what looks good only inside the browser.
For an exact material set, open Palette Builder, enable Show Blueprint-compatible blocks, choose supported blocks, then select Use palette in Blueprint. Review the offered selection and choose Apply selected palette, then generate the image. Applying the palette preserves the current image and plan until you regenerate; exact mode pauses category and Survival filters. Use Use category filters instead to return to family-based selection. The full catalog is a reference, not an automatically supported conversion palette. Neither path limits quantities to your inventory. For texture and material trade-offs, use the block palette planning guide.
Watch for texture noise
Some blocks match a color numerically but still look wrong because their textures are too busy. Flat-looking blocks usually make better "pixels" than patterned blocks.
If the output feels noisy, swap toward cleaner materials even if the color is slightly less accurate.
Check the dark and light extremes
Outlines, shadows, and highlights are where conversions break fastest. Look closely at:
- black areas becoming muddy gray
- white areas flattening into one surface
- skin tones shifting too orange or too pink
If those areas fail, the whole image usually feels off even when the middle colors are acceptable.
Step 4: Review the block plan, not just the preview
At this point, stop looking at the image as art and start looking at it as a build.
Ask:
- Does the main shape still read from a distance?
- Are the edges clean enough to place by hand?
- Are the important colors separated clearly?
- Would I still choose this width if I had to gather the blocks myself?
This is where Blueprint vs Draw matters. Blueprint mode is ideal when the uploaded image already defines the composition. If the result needs hand-fixing, use the Draw tab inside the editor after generating. That tab keeps the current grid available for manual edits; opening a fresh editor session is a different workflow.
Step 5: Use block counts before you build
Large projects are rarely blocked by conversion quality alone. They fail because the material plan is bad.
Before you build, use the shopping list and block totals to answer:
- Which blocks dominate the build?
- Which ones are expensive or slow to gather?
- Does the project still make sense at this width?
- Should I simplify the palette before starting?
If your main need is material math and stack planning, open the worked 16 × 16 blueprint example next. It shows the exact grid, material totals, and stack math produced by the shipped demo.
Use Download CSV in the construction guide to save the current material list. If a download fails, keep the plan open and retry; the material list remains available to read. On a phone, open the Guide tab to reach the list and its download action.
Practice with the shipped 16 × 16 example
You can check the workflow without finding an image first. Open the worked blueprint example, then choose Try Demo Blueprint. The demo is a pre-filled grid; it does not run a new image conversion.
The supplied plan has 256 placed blocks: 192 Lime Wool, 44 Green Wool and 20 Black Wool. That is three full stacks of Lime Wool, plus the other two material remainders. The total equals four stacks of 64, but mixed materials still occupy separate inventory stacks. The counts describe this demo, not a promised result for another upload.
- Check that the editor shows a 16 × 16 grid and the three material counts above.
- Open the Draw tab in the same editor session. The grid stays available for cleanup; opening a separate blank editor is unnecessary.
- Open Guide on a phone, then use Download CSV. Its material counts should sum to 256 if you have not changed the grid.
- If you paint or erase a cell, check the updated list before saving another CSV. A previous download is a snapshot and will not update itself.
Step 6: Build with the right viewing mode
Once the conversion looks right, the next question is how you will follow it while building.
Useful options include:
- full blueprint view for quick reference
- layer guidance for structured placement
- mobile viewer or QR sharing when the browser is not on the same screen as the game
This is where a usable blueprint workflow becomes different from a basic converter. The goal is not only to make the preview. The goal is to make placement easier.
Choose an export for the job
Blueprint, Draw, the Mural tool, Letters and Circles offer PNG, material CSV, Java function and Java structure NBT exports. Use Change export format beside the editor's main export button, choose Export format, then use the dialog's download action. Your choice is remembered separately for each tool in this browser; check the selected format before the next download.
- PNG: keep a visual plan beside the game. It is an image, not a world import or editable project backup.
- Materials CSV: gather blocks and check stacks/remainders. It lists quantities, not placement coordinates; empty cells are excluded.
- Java
.mcfunction: use relative placement commands in Java Edition. This requires cheats or operator permission and a configured datapack; the file does not install a datapack. - Java structure
.nbt: import into compatible Java structure tools. It is not native.litematic,.schemor Bedrock.mcstructure. Renaming it does not convert it. - Native
.litematic: a separate Java Litematica file for the same one-block-deep wall. It preserves air cells; inspect mod/version compatibility and air-placement settings. - Printable PDF: A4/Letter numbered material keys and construction charts, split over multiple pages for larger grids.
Blueprint's Java exports describe a one-block-deep vertical wall. Empty cells are omitted and do not clear existing world blocks. Check the destination space and your import tool's limits before using the file. For Bedrock, use the grid, PNG, CSV or phone viewer as manual references; these Java files do not provide a Bedrock import.
If command copying fails, the export dialog keeps the commands visible for manual selection or a function-file download. If file creation fails, keep the plan open and retry or choose another format. Neither a successful download nor a correct block count proves that a particular Minecraft client or mod has imported the build.
When to switch to Draw Mode
The best results often combine both workflows.
Use the Draw tab in your current editor session after Blueprint mode when you need to:
- clean a face or logo edge
- replace one or two ugly colors
- remove visual noise from a background
- adjust highlights manually
- sketch extra details that the source image did not provide well
Start with conversion when the image already contains the design. Start with Draw when you want to design the composition yourself from a blank grid.
Use a task-specific tool when the input changes
For a wall image with an in-page original/result comparison, open the Mural Generator. For a shop name or sign, the Letter Generator makes block-letter plans directly from text. For a circular or oval outline, the Circle Generator provides dimensions, center guidance and row runs without needing an uploaded image. These are separate starting points; their links do not transfer the current editor grid.
Common mistakes in image-to-block conversions
Starting too large
Huge canvases make weak images look more complicated, not better. Start smaller and scale only if the result holds up.
Ignoring the palette
If the output uses the wrong materials, it does not matter that the preview is technically close. Minecraft pixel art depends on practical block choices.
Building from preview alone
A visual preview is not enough. You need counts, a shopping list, and a way to follow the build.
Trying to save every detail from the source image
Minecraft block art is a reduction process. If a detail disappears at build scale, remove it instead of forcing it.
Quick decision guide
| Situation | Best next move |
|---|---|
| You already have an image and want a block plan | Start with Blueprint Mode |
| The conversion is close, but edges or colors need hand-fixing | Use the Draw tab in the current editor to keep the grid |
| You need to decide whether Blueprint or Draw fits the project | Read Blueprint vs Draw |
| You care most about stacks, shopping list, and material planning | Open the worked blueprint example |
| You are building for map colors rather than texture colors | Read Minecraft Map Art Tutorial |
FAQ
What is the best image size to upload?
There is no single best input size. What matters more is how clean the image is and what width you choose inside the blueprint tool.
Should I use a photo?
Only if the subject still reads clearly when simplified. Logos, sprites, icons, and illustrations usually convert more reliably than detailed photos.
Do I need to use Draw Mode after conversion?
Not always. Use it when the conversion is mostly correct and only a few areas need manual cleanup.
Is image to Minecraft blocks the same as map art?
Not exactly. Standard conversion targets block textures and normal viewing. Map art uses map colors and has different constraints. If that is your goal, follow the map art tutorial instead of a generic conversion workflow.
Does this turn a photo into a three-dimensional building?
No. Blueprint converts the image into a two-dimensional block grid; its Java exports make a one-block-deep vertical wall. It does not infer a house's depth, hidden sides, rooms, or a complete 3D model. The guide's Layer control focuses rows of that same grid, not floors of a volumetric building. Use Show all to return to the whole plan; focusing a row does not reduce the material totals or crop an export.
Can it identify the original blocks in a Minecraft screenshot?
No. The converter matches sampled image colors to its allowed blocks. It does not recognize which blocks were used in a screenshot, reconstruct their block states, or make a resource pack. The material CSV names the blocks chosen for the new plan, not verified blocks from the source scene.
Can I download a printable PDF?
In Change export format, choose Printable build plan (.pdf) and A4 or US Letter. The PDF contains a numbered material legend and paginated construction charts with global row/column coordinates; large grids span multiple sheets. Empty cells have no material number. Check print scaling before building. PNG remains an image reference and Materials CSV is a shopping list; none is an editable project backup.
Next step
If you already have the source image, go straight to Blueprint Mode and test a smaller width first.
If you want to inspect planning output before you commit, continue with the worked blueprint example.
Example sources and verification limits
The screenshot above is a first-party editor view. The 16 × 16 exercise comes from the demo shipped with Minecraft Pixel Art; its dimensions and material totals can be checked in the worked example and downloaded CSV. It is a browser plan, not a photograph of an in-game build. Current textures reference the pinned Java 1.21.11 snapshot of PrismarineJS minecraft-assets; that catalog does not establish Bedrock compatibility or rights for your uploaded artwork. Use images you own or have permission to use, check your game's block availability, and read How We Test for the scope of our checks. Report incorrect steps through Contact.